

Dealing with a dead car battery can be frustrating, especially when you’re in a hurry. We’ve all been there – standing helplessly beside our vehicle, hoping for a quick solution. That’s where jumper cables become your best friend, but connecting them incorrectly can damage your vehicle’s electrical system or even cause injury.
In this guide, we’ll walk you through a clear, step-by-step process for safely connecting jumper cables to revive your dead battery. We’ll share a foolproof diagram that eliminates confusion and ensures you’re making the right connections every time. Whether you’re a first-time car owner or simply need a refresher, our visual guide will give you the confidence to handle this common roadside emergency with ease.
Understanding Jumper Cables and Their Components
Jumper cables are essential tools for every vehicle owner, helping revive dead batteries by transferring power from a working vehicle. These cables consist of several key components that work together to ensure safe and effective power transfer.
Types of Jumper Cables
Jumper cables come in various gauges, lengths, and quality levels to suit different needs. The gauge number indicates the thickness of the wire, with lower numbers representing thicker cables that can carry more current. Standard jumper cables typically range from 4-gauge (thicker) to 10-gauge (thinner), with 4 to 6-gauge being ideal for most passenger vehicles. Heavy-duty cables feature thicker insulation and higher-quality clamps, making them more durable for frequent use or larger vehicles like trucks and SUVs. Compact jumper cables are shorter and lighter for easy storage but may not be suitable for larger engines or situations where vehicles can’t park close together.
Key Components of Jumper Cables
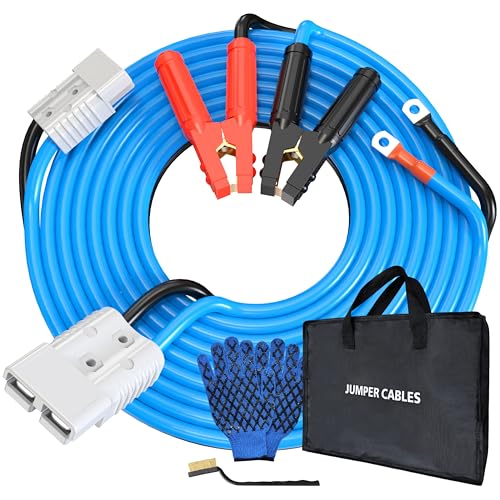
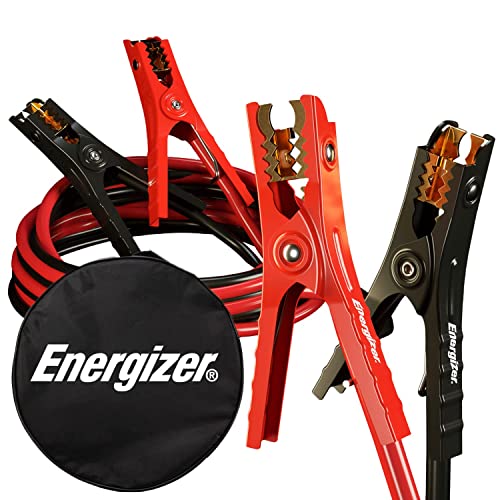
The clamps (or alligator clips) are metal connectors at each end of the jumper cables that attach to battery terminals. These clamps are color-coded—red for positive (+) and black for negative (-)—to prevent incorrect connections. Good quality clamps feature strong springs for secure attachment and teeth for better grip on battery terminals. The cables themselves are made of copper wire covered with insulation, typically made of rubber or PVC. Premium jumper cables often include heavy-duty insulation that remains flexible in extreme temperatures. Some modern jumper cables include additional safety features such as spark-proof technology, surge protectors, or reverse polarity indicators to prevent damage to vehicle electronics.
Choosing the Right Jumper Cables
Selecting appropriate jumper cables depends on your exact vehicle requirements. Cable length should be at least 12-16 feet to allow flexibility in positioning vehicles, while gauge thickness should match your engine size—4-gauge for larger engines and 6-gauge for standard passenger cars. Insulation quality matters in extreme weather conditions, with better-insulated cables remaining flexible in cold temperatures and resistant to melting in hot conditions. The clamp design should provide a secure grip, with copper-plated clamps offering better conductivity than aluminum or other metals. Many premium jumper cables now include carrying cases, gloves, or instruction guides to improve safety and convenience during emergency situations.


Safety Precautions Before Connecting Jumper Cables

Safety should always be your top priority when jump-starting a vehicle. Before connecting jumper cables, performing several critical checks can prevent accidents, injuries, and damage to both vehicles.
Protective Equipment to Wear
Proper protective gear is essential when handling car batteries and jumper cables. Insulated gloves provide protection against electrical shock and prevent direct contact with potentially corrosive battery acid. Safety glasses shield your eyes from sparks or acid splashes that can occur during the jump-starting process. Avoid wearing loose clothing, jewelry, or dangling accessories that might catch on engine components or create unwanted electrical connections between battery terminals.
Environmental Considerations
The environment where you jump-start a vehicle matters significantly for safety. Ensure the area around both vehicles is well-ventilated to prevent the buildup of potentially explosive hydrogen gas that batteries can emit. Keep all spark sources, including cigarettes, lighters, and open flames, away from the batteries to eliminate explosion risks. If you determine a battery is beyond repair, remember to dispose of it properly according to local regulations – most auto parts stores and recycling centers accept old batteries for environmentally responsible disposal.
Remember to check the battery condition before attempting a jump-start. Never try to jump-start a battery that shows signs of damage such as cracks, leaks, or visible corrosion. When attaching the cables, prevent the metal clamps from touching each other to avoid dangerous short circuits that could damage vehicle electronics or cause injury.

Step-by-Step Jumper Cable Connection Diagram

Connecting jumper cables correctly follows a exact sequence that ensures safety and effectiveness when jump-starting a vehicle. Our comprehensive diagram below illustrates the proper connection order and placement of each cable clamp to help you jump-start a dead battery without damaging your vehicle’s electrical system.
Identifying Positive and Negative Terminals
Battery terminals have distinct markings that make them easy to identify before connecting jumper cables. The positive terminal features a “+” sign and is typically colored red on most vehicle batteries. In contrast, the negative terminal displays a “-” sign and usually has a black color indicator. Correctly identifying these terminals is crucial as reversing them during connection can cause serious damage to your vehicle’s electrical components and potentially create dangerous situations.
Proper Connection Sequence Illustrated
Dead Vehicle Booster Vehicle
+ (Red) ------------> + (Red)
- (Black) ------------> Metal Ground (Dead Vehicle)
The connection sequence follows four exact steps for maximum safety:
- Connect the first red clamp to the positive (+) terminal of the dead battery
- Attach the other red clamp to the positive (+) terminal of the booster vehicle’s battery
- Fasten one black clamp to the negative (-) terminal of the booster vehicle’s battery
- Secure the final black clamp to an unpainted metal surface on the dead vehicle’s engine block, such as a bolt or bracket (not directly to the negative terminal)
This grounding technique for the final connection minimizes the risk of sparks near the battery where hydrogen gas might be present.
Common Connection Mistakes to Avoid
Jumper cable connection errors can lead to electrical system damage, battery explosions, or personal injury. Reversing polarity by connecting red clamps to negative terminals or black clamps to positive terminals poses important risks to both vehicles’ electrical systems. Allowing metal clamps to touch each other during the connection process creates dangerous short circuits that can damage components or cause sparks. Improper grounding occurs when connecting the final black clamp directly to the dead battery’s negative terminal instead of a metal ground point on the engine block, increasing explosion risks due to potential sparks near battery gases.
Starting the Dead Battery Using Jumper Cables

After properly connecting the jumper cables between the two vehicles, it’s time to start the dead battery and get your car running again. This process requires patience and careful attention to ensure both vehicles remain undamaged during the jump-start procedure.
Proper Engine Operation Procedures
Starting the booster vehicle’s engine is the first step to transferring power to the dead battery. Turn on the engine of the working vehicle and let it run for 2 to 3 minutes at a slightly increased idle speed to generate adequate charging current. During this time, the dead battery receives a small charge that helps prepare it for starting. After waiting, attempt to start the vehicle with the dead battery while keeping the booster car’s engine running. The engine should turn over if the connections are correct and the battery isn’t completely failed. If the car doesn’t start immediately, wait an additional 2 minutes with the booster vehicle running before trying again. Once started, keep both engines running for at least 30 minutes to allow the dead battery to recharge sufficiently through the vehicle’s alternator system.
Disconnecting the Jumper Cables Safely
Removing jumper cables follows a exact sequence to prevent electrical damage or sparks. Turn off both vehicles’ engines before beginning the disconnection process. Start by removing the black (negative) cable from the metal grounding point on the previously dead car. Next, detach the other end of the black cable from the negative terminal of the booster battery. Then, disconnect the red (positive) cable from the booster battery’s positive terminal. Finally, remove the remaining red cable from the previously dead battery’s positive terminal. This reverse-order disconnection prevents creating a circuit that could cause sparks or electrical damage. Handle the cables carefully during removal to avoid allowing the metal clamps to touch each other or any metal surfaces. Coil and store your jumper cables properly after use to maintain their condition for future emergencies.


Alternative Jump Starting Methods

When jumper cables aren’t available, you’re not completely out of options. Several alternative methods can help get your vehicle running again without traditional jumper cables.
Portable Jump Starter (Battery Pack)
Portable jump starters provide a convenient solution for jump-starting vehicles without needing another car. These compact devices store enough power to start most passenger vehicles multiple times on a single charge. To use a portable jump starter, connect the positive clamp to the positive terminal of your dead battery and attach the negative clamp to a clean, unpainted metal surface under the hood—not directly to the battery’s negative terminal. Always follow the manufacturer’s exact instructions for your device to ensure safe operation.
Roadside Assistance
Professional roadside assistance offers a hassle-free alternative when you lack equipment or experience. Most auto insurance policies, motor clubs like AAA, and even some credit card companies include jump-starting services in their roadside assistance packages. Trained professionals arrive with the proper equipment and expertise to safely get your vehicle running again without risking damage to electronic components.
Push Start (Manual Transmission Only)
For manual transmission vehicles, push starting (also called bump starting) can work in emergency situations. This method relies on using the vehicle’s momentum to engage the engine. Put your car in second gear with the ignition turned on, then have several people push the vehicle until it reaches about 5-10 mph. Once moving, release the clutch quickly while gently pressing the accelerator to start the engine. This technique doesn’t work for automatic transmission vehicles and shouldn’t be used regularly as it may cause additional wear on your vehicle’s components.
Using these alternative methods gives you flexibility when facing a dead battery situation without jumper cables. The portable jump starter option particularly stands out as a reliable solution worth keeping in your vehicle for emergencies.

Maintaining Your Jumper Cables for Emergency Use

Regular maintenance of your jumper cables ensures they’ll work properly when you face a battery emergency. Checking your cables for signs of wear such as frayed wires or corroded clamps prevents potential failures during critical situations. Jumper cables last longer when stored in a dry, cool place away from extreme temperatures or moisture that could damage the insulation.
Regular Inspection Protocols
Inspecting your jumper cables every 3-4 months helps identify potential issues before they become problems. Look closely at the wire insulation for cracks, brittleness, or exposed metal that might create dangerous shorts. Examine the clamps for corrosion, loose connections, or broken teeth that could prevent proper contact with battery terminals. Clean any corrosion from the clamps using a mixture of baking soda and water, then dry thoroughly to prevent future buildup.
Proper Storage Techniques
Storing jumper cables properly extends their lifespan significantly. Coil your cables neatly without tight bends that might damage the internal wiring. Keep them in their original carrying case or a dedicated storage bag to prevent tangling and wire damage. Place the storage container in your trunk away from sharp objects, heavy items, or chemicals that could damage the cable insulation. Temperature extremes reduce cable flexibility and degrade insulation quality, so position them away from direct heat sources in your vehicle.
When to Replace Your Jumper Cables
Replace your jumper cables immediately if you notice exposed wires, as these create serious safety hazards. Cables with clamps that don’t open and close properly won’t create secure connections during jump-starting. Stiff, inflexible cables indicate age-related deterioration of the insulation and require replacement. Most quality jumper cables last 5-7 years with proper care before insulation begins to naturally degrade. Investing in new cables costs far less than dealing with damaged vehicle electronics from using compromised jumper cables.


Conclusion
Understanding how to properly connect jumper cables is an essential skill for every driver. With the right equipment and knowledge we’ve shared in this guide you can confidently handle a dead battery situation safely and effectively.
Remember that choosing quality cables based on your vehicle’s needs maintaining them properly and following the correct connection sequence are all crucial steps for success. Always prioritize safety by wearing protective gear checking for battery damage and working in a well-ventilated area.
Whether you opt for traditional jumper cables portable jump starters or professional assistance you’re now equipped with the knowledge to get back on the road quickly when faced with a dead battery emergency.
Frequently Asked Questions
How do I properly connect jumper cables?
Always connect in the correct sequence: first red clamp to dead battery’s positive terminal, second red clamp to working battery’s positive terminal, third black clamp to working battery’s negative terminal, and fourth black clamp to an unpainted metal surface on the dead car’s engine. Never let the clamps touch each other. Always ensure both vehicles are off before connecting cables.
What gauge jumper cables should I buy?
For most passenger vehicles, choose jumper cables with a gauge between 4 and 6. Remember, the lower the gauge number, the thicker the cable and the more current it can carry. Thicker cables (lower gauge) perform better but cost more. Consider your vehicle size—larger vehicles like trucks may require 2-gauge cables for effective power transfer.
How long should I run cars after a jump-start?
After successfully jump-starting your vehicle, keep both engines running for at least 30 minutes. This allows sufficient time for the alternator to recharge the dead battery. Driving the previously dead vehicle during this period can help charge the battery more efficiently than idling. If possible, avoid turning off the engine before completing this charging period.
What safety precautions should I take when jump-starting a car?
Wear insulated gloves and safety glasses to protect against electrical shock and battery acid. Ensure you’re in a well-ventilated area away from spark sources. Check the battery for cracks or leaks before attempting to jump-start. Make sure both vehicles are turned off and in park/neutral with parking brakes engaged before connecting cables.
Can I jump-start my car without another vehicle?
Yes, you have alternatives. Portable jump starters are compact devices that can start most vehicles multiple times on a single charge without needing another car. Professional roadside assistance is another option where trained professionals safely jump-start your vehicle. Cars with manual transmissions can sometimes be push-started by engaging the clutch at the right moment.
How do I know if my jumper cables need replacement?
Inspect your jumper cables every 3-4 months for signs of wear including cracked insulation, exposed wires, corroded or loose clamps, and bent connectors. If you notice any of these issues, it’s time to replace them. Quality jumper cables should last 5-7 years with proper care. Never use damaged cables as they present serious safety hazards.
What should I do if jump-starting doesn’t work?
If your car doesn’t start after attempting to jump-start, wait an additional 2 minutes with the donor car running before trying again. If it still fails, ensure all connections are clean and tight. The problem might be more serious than a dead battery—possibly a faulty alternator, starter motor, or other electrical issues requiring professional diagnosis.
How do I safely disconnect jumper cables?
Turn off both vehicles before disconnecting. Remove cables in the reverse order of connection: first remove the black clamp from the metal surface of the previously dead car, then the black clamp from the donor battery, followed by the red clamp from the donor battery, and finally the red clamp from the previously dead battery. Handle carefully to avoid sparks.