
When your car battery dies, knowing the correct jumper cable procedure isn’t just helpful—it’s essential for your safety. Many drivers face that moment of uncertainty: which jumper cable goes on first? It’s a common question that deserves a clear answer, especially when you’re standing in a parking lot with a dead battery.
We’ve all been there, staring at those red and black clamps wondering about the right sequence. Using jumper cables incorrectly can lead to dangerous sparks, battery damage, or even electrical system failures in your vehicle. In this guide, we’ll walk you through the proper order for connecting jumper cables to get you back on the road safely and confidently.
Understanding Jumper Cables and Their Purpose
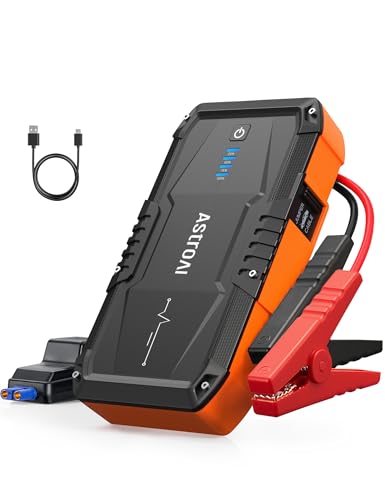
Jumper cables serve as a critical emergency tool for drivers, providing a temporary electrical connection between a functional battery and a dead one. These cables consist of two insulated wires with alligator clips at both ends, typically color-coded in red and black to indicate positive and negative connections. Red cables always connect to the positive terminals, while black cables connect to the negative terminals or grounding points.
Car batteries operate at 12 volts and supply the necessary electrical current to start your vehicle’s engine. When a battery lacks sufficient charge to power the starter motor, jumper cables create a circuit that allows electricity to flow from a donor vehicle’s healthy battery to the dead battery. This temporary power boost enables the disabled vehicle to start while simultaneously beginning to recharge its depleted battery.
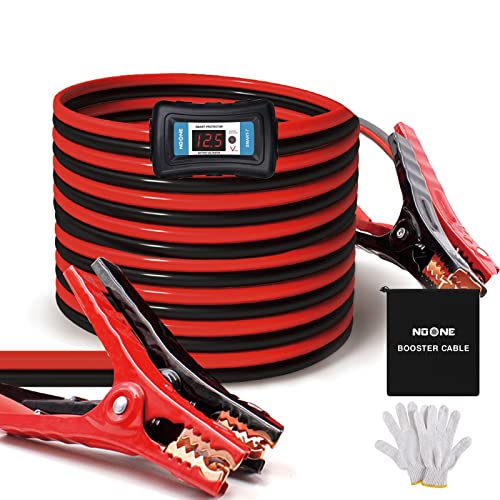
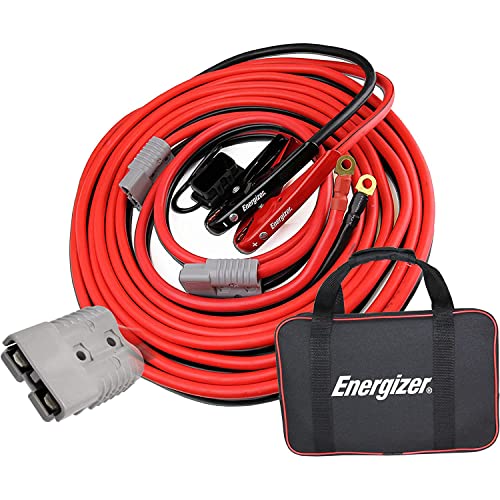
The thickness of jumper cables matters significantly for effective performance. Cables are rated by gauge numbers, with lower numbers indicating thicker wires capable of carrying more current. Heavy-duty cables (typically 4-6 gauge) transfer power more efficiently and heat up less during use compared to thinner 8-10 gauge varieties. For most passenger vehicles, 4-6 gauge cables provide optimal performance in emergency situations.
Safety features in modern jumper cables include fully insulated handles, tangle-resistant designs, and sometimes built-in surge protectors. High-quality cables also feature strong, serrated clamps that provide secure connections to battery terminals. These design elements help prevent accidental short circuits, electrical arcs, or other potentially dangerous situations during the jumping process.
The Correct Order for Connecting Jumper Cables
Connecting jumper cables in the right sequence is crucial for safety and effectiveness when jump-starting a vehicle. Following these four exact steps ensures you’ll avoid electrical damage and potential hazards during the process.
Red Cable to Dead Battery’s Positive Terminal First
The jump-start process begins by attaching the red clamp to the positive terminal (+) of the dead battery. This terminal is typically marked with a plus sign or the letters “POS” and often has a red cover for easy identification. Connecting this terminal first establishes the initial point in the electrical circuit and minimizes the risk of sparks near the battery where flammable gases might be present.
Red Cable to Working Battery’s Positive Terminal Second
After securing the first connection, attach the other end of the red jumper cable to the positive terminal (+) of the working vehicle’s battery. This creates the positive side of the circuit between the two vehicles. Proper attachment means ensuring the clamp has a firm grip on the terminal with good metal-to-metal contact. Double-checking this connection helps guarantee efficient power transfer from the donor battery.
Black Cable to Working Battery’s Negative Terminal Third
The third step involves connecting the black clamp to the negative terminal (–) of the working vehicle’s battery. This terminal is usually identified by a minus sign or “NEG” label and often has a black cover. Connecting in this order builds the circuit methodically while minimizing the chance of dangerous sparks near the potentially volatile dead battery.
Black Cable to Ground on Dead Car Last
The final connection is made by attaching the remaining black clamp to an unpainted metal part on the engine or chassis of the car with the dead battery. This ground connection should be made away from the battery itself, such as on an engine bolt or bracket. Creating this ground point rather than connecting directly to the dead battery’s negative terminal prevents sparks near the battery where hydrogen gas might be present, significantly reducing explosion risks. This strategic placement acts as a safety measure that completes the circuit while directing any potential sparks away from volatile battery gases.
Why the Order Matters: Safety Considerations
The sequence for connecting jumper cables isn’t arbitrary—it’s designed with safety as the primary concern. Following the correct order protects both you and your vehicle from potential hazards that can occur during the jump-starting process.
Preventing Electrical Sparks
Attaching the negative clamp to an unpainted metal surface rather than directly to the dead battery’s negative terminal significantly reduces risk. This grounding technique keeps sparks away from the battery itself, where hydrogen gas might be present. Sparks near a battery can ignite this hydrogen gas, potentially causing an explosion or fire. Many automotive experts recommend connecting to a metal component on the engine block or chassis frame for optimal safety. The distance from the battery creates a safer environment for the final connection, which is when sparks are most likely to occur.
Avoiding Battery Damage
Incorrect jumper cable connections can lead to expensive electrical system damage beyond just the battery. Reversing the polarity (connecting positive to negative or vice versa) sends electrical current flowing in the wrong direction through sensitive components. This mistake often damages the alternator, onboard computers, and other electronic systems, potentially resulting in repair costs much higher than a simple battery replacement. The proper connection sequence—positive to positive, then negative to the working battery and finally to a ground point on the dead vehicle—creates a circuit that protects all electrical components while still allowing the transfer of starting power.

Common Mistakes When Connecting Jumper Cables
Reversing Polarity
Reversing the polarity of jumper cables ranks as one of the most dangerous errors when jump-starting a vehicle. Connection of the red clamp to a negative terminal or the black clamp to a positive terminal can severely damage your car’s electrical system. This critical mistake often leads to expensive repairs and potentially causes battery explosions that put your safety at risk. Always double-check that red connects to positive (+) and black connects to negative (-) before completing any connections.
Incorrect Grounding
Improper grounding creates unnecessary hazards during the jump-starting process. The final black clamp must attach to an unpainted metal part on the engine block or chassis of the vehicle with the dead battery—not directly to the negative terminal. Many car owners mistakenly connect this clamp to the dead battery’s negative post, which positions the connection too close to potentially explosive hydrogen gas. Proper grounding ensures any sparks occur away from the battery, dramatically reducing explosion risks.
Touching Clamps
Metal clamps that contact each other during the connection process can create dangerous short circuits. Keep the clamps completely separated while attaching them to their respective connection points. Accidental contact between metal parts generates sparks and potentially damages both vehicles’ electrical systems. Extra caution when handling the cables prevents this easily avoidable but serious mistake.
Ignoring Battery Condition
Attempting to jump-start a visibly damaged battery creates important safety risks. Cracked cases, leaking fluid, or bulging batteries should never be jump-started, as they’re already compromised and unstable. These batteries might rupture, leak corrosive acid, or even explode when charged with jumper cables. Always inspect both batteries for damage before connecting any cables to avoid dangerous situations and additional vehicle damage.
Incorrect Disconnection Sequence
Many drivers disconnect jumper cables in the wrong order after successfully starting the vehicle. The correct disconnection sequence follows the reverse order of connection: first remove the black clamp from the unpainted metal surface, then from the working battery’s negative terminal, followed by the red clamps from both batteries. Disconnecting in the wrong order can create dangerous sparks near the battery or damage sensitive electronic components in modern vehicles.
Proper Disconnection Sequence When Jump Starting
After successfully jump-starting your vehicle, it’s essential to disconnect the jumper cables in the correct order to maintain safety and prevent damage to electrical components. The disconnection process follows a exact sequence that differs from the connection order.
Step-by-Step Disconnection
- Remove the black clamp from the unpainted metal surface
- First, detach the black (negative) clamp from the grounding point on the engine of the car with the previously dead battery
- This initial step breaks the ground connection in a controlled manner
- Disconnect the black clamp from the donor vehicle
- Next, remove the black clamp from the negative terminal of the working vehicle’s battery
- Taking this step second ensures the negative circuit is completely broken
- Remove the red clamp from the donor vehicle
- Detach the red (positive) clamp from the positive terminal of the working vehicle’s battery
- This third step starts breaking the positive connection safely
- Disconnect the final red clamp
- Finally, remove the red clamp from the positive terminal of the formerly dead battery
- Completing the disconnection process with this step prevents any potential shorts
Following this exact disconnection sequence minimizes the risk of sparks near the battery and protects the sensitive electronics in both vehicles. The process essentially works in reverse order from how the cables were attached, with the exception that you’re removing the ground connection (black clamp on metal surface) first instead of last.
Additional Safety Tips for Jump Starting a Vehicle
Correct Polarity
Correct polarity prevents damage to your vehicle’s electrical system. Always connect the red clamp to the positive terminal (+) and the black clamp to the negative terminal (-). This color-coding system isn’t arbitrary—it’s designed to prevent potentially costly electrical system damage and ensure a safe jump-starting process.
Vehicle Positioning
Position both vehicles close enough for the jumper cables to reach but ensure they don’t touch each other. Proper positioning creates a safe environment for the jump-starting process while maintaining enough distance to prevent any accidental vehicle contact that could cause damage or create electrical hazards.
Battery Condition
Check batteries for cracks or leaks before attempting a jump-start. Damaged batteries pose important safety risks and can cause further problems if jump-started. If you notice any physical damage, it’s safer to call for professional assistance rather than risking personal injury or additional vehicle damage.
Clean Terminals
Clean any corrosive debris from battery terminals before connecting jumper cables. Corrosion on terminals interferes with the electrical connection, potentially preventing a successful jump-start. Use a wire brush or battery cleaning tool to remove buildup for optimal electrical conductivity.
Avoid Short Circuits
Keep the clamps separated throughout the process to prevent short circuits. Accidental contact between clamps can create dangerous sparks, damage vehicle electronics, or cause personal injury. Handle one clamp at a time and be mindful of their placement during the entire procedure.
Start the Working Vehicle
Start the engine of the working vehicle first and let it idle for a few minutes before attempting to start the dead car. This initial idling period allows the working battery to deliver a stronger charge to the dead battery, increasing the chances of a successful jump-start.
Disconnecting Cables
Remove jumper cables in the reverse order of installation once the dead car is running. First, detach the black clamp from the grounded metal, then from the working battery, followed by the red clamps from the working battery and finally from the previously dead battery. Following this sequence minimizes the risk of sparks when disconnecting.
Recharging the Battery
Drive the jump-started vehicle for at least 20 minutes after a successful jump. This extended driving time allows the alternator sufficient opportunity to recharge the battery. Short drives after a jump-start may not fully recharge the battery, potentially leaving you stranded again when you next attempt to start the vehicle.
Conclusion
Properly connecting jumper cables isn’t just about getting your car started—it’s about doing so safely. Remember the correct sequence: red to dead battery positive, red to donor battery positive, black to donor battery negative, and black to unpainted metal on the dead car.
This proper order prevents potentially dangerous sparks and protects your vehicle’s sensitive electronics from costly damage. When disconnecting, follow the reverse order to maintain safety throughout the process.
Jumper cables are essential emergency tools that every driver should know how to use correctly. With this knowledge, you’ll be prepared to handle battery emergencies confidently and get back on the road quickly and safely.
Frequently Asked Questions
What is the correct order for connecting jumper cables?
First, connect the red clamp to the dead battery’s positive terminal. Second, attach the other red clamp to the working battery’s positive terminal. Third, connect the black clamp to the working battery’s negative terminal. Finally, attach the remaining black clamp to an unpainted metal surface on the dead car’s engine block or frame (not to the negative terminal). This sequence minimizes spark risks near the battery.
Why shouldn’t I connect the final black clamp to the dead battery’s negative terminal?
Connecting the final black clamp to an unpainted metal surface instead of the dead battery’s negative terminal prevents dangerous sparks near the battery. Dead batteries can release hydrogen gas, which is highly flammable. A spark near this gas could cause an explosion or fire. The metal surface provides proper grounding while keeping potential sparks away from the battery.
What happens if I connect the jumper cables in the wrong order?
Connecting jumper cables incorrectly can cause dangerous sparks, battery explosions, or serious damage to your vehicle’s electrical system. Reversing polarity (connecting positive to negative) can destroy expensive components like the alternator, onboard computers, and electronic modules. These repairs often cost hundreds or thousands of dollars—far more than a simple battery replacement.
How do I disconnect jumper cables safely?
Disconnect in the reverse order of connection: First, remove the black clamp from the metal surface on the dead car. Second, disconnect the black clamp from the donor vehicle’s negative terminal. Third, remove the red clamp from the donor vehicle’s positive terminal. Finally, detach the red clamp from the formerly dead battery. This sequence prevents sparks and protects electronics.
What gauge jumper cables should I use?
Use heavy-duty jumper cables in the 4-6 gauge range for optimal power transfer. Thicker cables (lower gauge numbers) provide better electrical flow and are more effective for jump-starting vehicles, especially larger ones. Avoid thin, lightweight cables as they may not deliver sufficient current to start your vehicle, particularly in cold weather conditions.
How long should I drive after a jump start?
Drive the jump-started vehicle for at least 20-30 minutes after starting it successfully. This allows your alternator sufficient time to recharge the battery. Shorter drives may leave your battery insufficiently charged, potentially leaving you stranded again when you restart your vehicle. Highway driving at moderate speeds is ideal for efficient recharging.
Can I jump start a car in the rain?
Yes, you can jump start a car in the rain, but take extra precautions. Make sure your hands and the jumper cables are as dry as possible. Stand on a dry surface if available and be especially careful not to touch the metal parts of the clamps. The risk comes from you becoming a conductor, not from the car batteries themselves.
How can I tell if my battery needs replacement rather than just a jump?
If your battery requires frequent jump starts, holds charge for short periods, is more than 3-5 years old, has a swollen case, shows terminal corrosion, or produces a rotten egg smell, it likely needs replacement. Modern batteries also often have a health indicator that changes color (usually from green to black or yellow) when replacement is needed.
