Are you experiencing frustrating belt issues with your Can-Am Defender? You’re not alone. We’ve seen countless owners struggle with belt problems that can leave them stranded on trails or constantly reaching for their wallets for replacements.
At our shop, we’ve diagnosed and fixed hundreds of Can-Am Defender belt failures over the years. From premature wear and slipping to complete breakages, these belt problems can significantly impact your vehicle’s performance and reliability. The good news? Most of these issues have practical answers that don’t require expensive dealer visits.
In this comprehensive guide, we’ll break down the most common Can-Am Defender belt problems, their causes, and actionable fixes you can carry out. Whether you’re a weekend warrior or rely on your Defender for work, understanding these belt issues will save you time, money, and headaches.
Common Belt Problems in Can-Am Defender Models
Can-Am Defender vehicles experience several recurring belt issues that owners frequently encounter. These problems range from premature wear to complete failure, often manifesting through exact symptoms that indicate trouble.
Premature Belt Wear
Premature belt wear affects many Can-Am Defender owners, typically appearing after just 500-1,000 miles of use. The factory-installed belts sometimes deteriorate much earlier than their expected 3,000-5,000 mile lifespan. Signs of this issue include visible fraying along the belt edges, cracks on the belt surface, and a noticeable thinning of the belt material. Regular inspection reveals threads separating from the main belt structure, indicating the beginning stages of failure.
Belt Slipping During Operation
Belt slipping creates immediate performance issues in Can-Am Defenders, especially during acceleration or when climbing steep terrain. The symptoms manifest as a high-pitched squealing noise accompanied by reduced power transfer to the wheels. This problem typically occurs when the belt loses proper tension or when the clutch system fails to maintain optimal grip. Many owners report slipping happening more frequently in wet conditions or after water crossings when moisture compromises the friction between the belt and clutch surfaces.
Complete Belt Failure
Complete belt failure represents the most severe belt problem for Can-Am Defender vehicles. The belt snaps completely, leaving riders stranded, often in remote locations. This catastrophic failure happens suddenly, preceded by burning rubber smells and unusual vibrations from the clutch housing. Statistics show that approximately 15% of Defender owners experience complete belt failure within the first 2,000 miles of operation. The aftermath includes potential damage to the clutch components and surrounding parts when belt fragments scatter throughout the CVT housing.
Unusual Noise from CVT Housing
Unusual noises from the CVT housing serve as early warning signals of developing belt problems. These sounds include chirping, squeaking, and grinding noises that increase in volume during acceleration or deceleration. The noise patterns change depending on the exact issue - intermittent squeaking often indicates misalignment, while constant grinding suggests debris contamination. Many owners report hearing these noises for 50-100 miles before experiencing more serious belt problems, providing a critical window for preventive maintenance.
Belt Contamination Issues
Belt contamination issues plague Can-Am Defenders operating in challenging environments. Mud, water, dust, and debris enter the CVT housing through small gaps or improperly sealed covers, settling on the belt and clutch surfaces. This contamination acts as an abrasive agent, accelerating wear and decreasing performance efficiency by 20-30%. The problem worsens in regions with fine dust or when riders frequently cross shallow water bodies. Contaminated belts develop uneven wear patterns and may slip unpredictably during operation.
Signs Your Can-Am Defender Belt Needs Replacement
Identifying the early warning signs of belt issues in your Can-Am Defender can save you from unexpected breakdowns and costly repairs. These critical indicators typically manifest in exact ways that are relatively easy to recognize once you know what to look for.
Unusual Noises and Vibrations
Distinctive sounds often signal belt problems in Can-Am Defenders. A rattling noise coming from the clutch area typically indicates a broken spring in either the primary or secondary clutch, or possibly broken clutch buttons. Many riders report hearing a slipping sound from the rear area, particularly noticeable during initial acceleration or when starting off from a stop position. You’ll also want to pay attention to any shuddering sensations when beginning to move or rattling when coming to a complete stop, as these are telltale signs that your belt may be failing. These audible and physical cues shouldn’t be ignored, as they’re your vehicle’s way of communicating that the belt system needs attention.
Reduced Performance and Power Loss
Performance issues directly correlate with belt deterioration in Can-Am Defenders. Belts that snap or become dislodged from their tracks during rides immediately result in noticeable power delivery problems and reduced overall performance. Even if your belt appears intact upon visual inspection, damage or excessive wear can cause your vehicle to slip, especially when operating in high gear. This slippage translates to a frustrating loss of power and responsiveness that compromises your riding experience. The connection between your engine and wheels depends entirely on the integrity of your belt, making any power transfer issues a clear indication that replacement may be necessary.
Causes of Belt Failures in Can-Am Defenders
After years of working with Can-Am Defenders, we’ve identified several key factors that contribute to belt failures. Understanding these causes can help you avoid costly repairs and extend the life of your UTV’s drive belt significantly.
Extreme Operating Conditions
Severe operating environments represent one of the primary culprits behind Can-Am Defender belt failures. Heavy loads combined with hard acceleration place tremendous stress on the belt system, often causing it to snap or become dislodged from its tracks. Muddy or boggy terrain creates particularly challenging conditions where stuck vehicles experience excessive belt strain when drivers continue spinning the wheels attempting to free themselves. Full power application in adverse conditions like deep mud or while pulling substantial loads causes new belts to slip more readily, potentially glazing the sides and dramatically reducing overall belt lifespan.
Improper Maintenance Practices
Neglecting regular maintenance stands as a leading cause of premature belt failures in Can-Am Defenders. Skipping manufacturer-recommended service intervals prevents detection of early wear signs that could otherwise be addressed before catastrophic failure occurs. Many owners fail to properly break in new drive belts, a critical procedure that ensures optimal pulley grip and long-term performance. Ignoring unusual noises such as squeaking or chirping from the UTV frequently indicates a worn or loosened belt that requires immediate attention. Unaddressed clutch issues, including broken springs or clutch buttons, directly impact belt performance and accelerate failure rates when left unchecked.
Regular inspections and proper washing after exposure to harsh conditions can prevent many common belt problems. Thorough cleaning, especially after muddy rides, removes potentially damaging debris that could otherwise become trapped in the belt system.
How to Diagnose Belt Issues in Your Can-Am Defender
Accurate diagnosis is crucial for solving belt problems in your Can-Am Defender. Our diagnostic approach combines visual inspection with performance testing to identify issues before they lead to complete failure.
Visual Inspection Techniques
Visual inspection offers immediate clues about your Can-Am’s belt condition. Check the belt edges for color changes, which typically indicate overheating and potential belt failure. Examine the sheaves (pulleys) for black rubber streaks, a telltale sign of belt slippage that can cause reduced performance. Look closely at the belt surface for cracks, fraying, or excessive edge wear—these physical deteriorations suggest the belt is approaching the end of its useful life. Taking photos during regular inspections helps track progressive wear and makes it easier to identify when replacement becomes necessary.
Performance Testing Methods
Performance testing reveals belt issues that might not be immediately visible. Listen for squealing noises during acceleration or rattling sounds when coming to a stop, as these acoustic warnings frequently indicate belt slippage. Monitor how your Defender behaves when starting off—shuddering or hesitation often points to belt-related problems affecting power transfer. Pay attention to high gear performance; slippage in this range isn’t always belt-related but remains a common symptom worth investigating. Test acceleration from a complete stop to identify any power delivery inconsistencies, which typically manifest when the belt can’t properly grip the clutch surfaces. Combining these performance tests with a thorough inspection of secondary clutch components, particularly the rollers, provides a comprehensive assessment of your Can-Am’s belt system health.
DIY Belt Replacement Guide for Can-Am Defenders
Replacing a worn or damaged belt on your Can-Am Defender is a task you can complete at home with the right tools and approach. This guide walks you through the entire process from preparation to final testing.
Tools and Materials Needed
Gathering the right equipment before starting your belt replacement job saves time and prevents frustration. A compatible replacement belt designed specifically for your Can-Am Defender model serves as the most critical component. A specialized belt removal tool, available for approximately $30, makes the job significantly easier by helping release tension on the clutch system. Basic mechanical tools including a jack, tire removal equipment, and standard wrenches are necessary for accessing the belt housing. Safety equipment such as gloves and protective eyewear should always be worn to prevent injuries during the replacement process.
Step-by-Step Replacement Process
- Prepare the Vehicle
Secure your Defender on level ground and engage the parking brake before beginning work. Jack up the vehicle carefully at the manufacturer’s recommended lifting points to gain proper access to the work area. Remove the tire completely to expose the belt box cover, creating sufficient space to work comfortably.
- Access the Belt Box
Locate and remove the belt box cover bolts using the appropriate wrench size. The cover typically attaches with multiple fasteners that require careful removal to avoid damaging the housing. Once unbolted, gently pull the cover away to expose the complete CVT (Continuously Variable Transmission) system.
- Inspect and Remove the Old Belt
Examine the current belt thoroughly for signs of damage like cracks, fraying edges, or glazed surfaces. These visual indicators help identify what caused the original failure. Position the belt removal tool correctly on the secondary clutch to create slack in the system. Carefully work the old belt off the pulleys, noting its orientation for proper installation of the replacement.
- Clean the CVT System
Take advantage of this access to thoroughly clean both primary and secondary clutches of any debris or belt material. Contamination within the CVT system dramatically reduces performance and accelerates wear on new components. Inspect clutch faces for scoring or damage that might affect the new belt’s performance.
- Install the New Belt
Position the new belt with the same orientation as the original, ensuring any directional markings align properly. Place the belt first on the secondary clutch then use the removal tool to create enough slack to work it onto the primary clutch. Verify the belt seats properly in both clutch grooves without twisting or pinching.
- Reassemble
Replace the belt box cover securely, tightening bolts to the manufacturer’s specifications to prevent water and debris infiltration. Remount the tire and lower the vehicle carefully from the jack stands. Test the new belt by operating the vehicle through various speeds and loads to ensure smooth engagement and proper function.
Regular maintenance checks extend belt life significantly, with inspections recommended every 500 miles or after particularly challenging riding conditions. Proper break-in of a new belt involves avoiding heavy loads and extreme acceleration for the first 30 miles of operation. Clean the CVT system after riding in wet or muddy conditions to prevent contaminants from causing premature wear on your freshly installed belt.
Preventative Maintenance to Extend Belt Life
Regular maintenance significantly extends the lifespan of your Can-Am Defender’s belt system. Following these key practices helps avoid common belt failures and keeps your UTV performing at its best.
Regular Inspection and Maintenance
Following the manufacturer’s recommended service schedule is essential for maintaining optimal belt performance. Regular inspections can identify potential issues before they become major problems. We recommend checking your belt for signs of wear, including cracks, frays, or heat damage during each service interval. These visual indicators often appear before complete failure occurs.
Monitoring Belt Condition
Pay close attention to symptoms that indicate developing belt issues. Power delivery problems, slipping sensations, rattling noises, or a shudder when starting are telltale signs of belt wear or damage. Early detection of these symptoms allows for timely replacement before catastrophic failure occurs during a ride.
Cleaning and Washing Procedures
Proper cleaning after riding in harsh conditions prevents premature belt wear. Mud, dust, and debris can infiltrate the belt housing and cause accelerated deterioration. A thorough rinse after each ride in challenging terrain removes abrasive particles that would otherwise damage the belt and surrounding components.
Proper Belt Replacement
Replacing a damaged or worn belt promptly prevents secondary damage to other drivetrain components. The replacement process involves accessing the belt box, removing the tire, and then the belt box cover. Inspect the rollers in the secondary clutch during replacement - they often require changing when the belt fails. This maintenance task requires only basic tools and a new belt.
Load and Usage Considerations
The belt endures substantial forces during hard acceleration, especially under heavy loads. Monitor your cargo weight and driving style to minimize excessive stress on the belt system. Aggressive acceleration while carrying maximum loads puts extreme pressure on the belt, potentially leading to premature failure.
Additional Component Inspection
Rattling in the clutch area may indicate problems beyond the belt itself. Broken springs in the primary or secondary clutch or worn clutch buttons can cause belt damage if left unaddressed. We recommend inspecting these components whenever accessing the belt box to ensure the entire drive system functions properly.
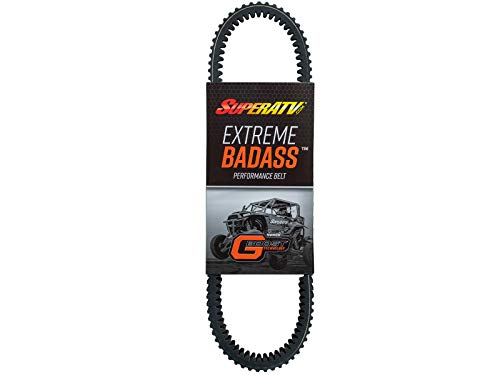
Aftermarket vs. OEM Belts: Which Is Better for Your Defender?
OEM belts provide guaranteed compatibility with your Can-Am Defender because they’re manufactured to meet exact specifications set by the original manufacturer. These factory-designed belts undergo rigorous testing specifically for Defender models, ensuring optimal performance in all conditions. Though typically more expensive than aftermarket options, OEM belts come with warranty coverage and quality assurance that can’t be overlooked.
Aftermarket belts offer a cost-effective alternative for Defender owners on a budget. Many aftermarket manufacturers produce high-quality belts that match or sometimes exceed OEM performance at a lower price point. Quality varies significantly between brands, but, with some failing to meet the precise specifications needed for proper operation in your Defender.
Performance differences between these options often depend on your exact riding conditions. OEM belts excel in maintaining consistent performance across various terrains and temperatures, having been designed specifically for the Defender’s unique power delivery system. Aftermarket belts from reputable manufacturers can deliver comparable performance, particularly those engineered with enhanced materials for extreme conditions.
Reliability concerns exist with both options. OEM belts provide peace of mind through factory testing and validation, making them the safer choice for owners who prioritize dependability. High-quality aftermarket belts from established brands can also offer excellent reliability when they meet or exceed factory specifications, though lesser-known brands might compromise longevity.
Regular maintenance remains essential regardless of which belt you choose. Inspecting your belt for signs of wear, ensuring proper alignment, and following the manufacturer’s replacement schedule prevents premature failures in both OEM and aftermarket belts. Belt issues like slippage, unusual noises, or rattling indicate potential problems requiring immediate attention, regardless of the belt type installed.
Conclusion
Addressing Can-Am Defender belt problems promptly can save you thousands in repair costs and prevent trailside breakdowns. By recognizing warning signs early and following our maintenance recommendations you’ll significantly extend your belt’s lifespan.
Whether you choose OEM or high-quality aftermarket replacements the key is consistent inspection and proper riding habits. Remember that your driving style directly impacts belt longevity - avoid aggressive acceleration and heavy loads when possible.
We’ve found that most belt failures are preventable with proper care. Carry out regular cleaning check for wear patterns and listen for unusual noises. These simple habits will keep your Defender performing reliably for years to come ensuring your UTV remains ready for your next adventure.
Frequently Asked Questions
What are the common signs that my Can-Am Defender belt needs replacement?
Look for unusual noises like rattling from the clutch area or squealing during acceleration. Physical sensations such as shuddering when starting or vibrations during operation are warning signs. Reduced performance, especially when climbing hills or carrying loads, indicates belt deterioration. Regular visual inspections can reveal fraying, cracks, or discoloration before complete failure occurs.
How often should I replace my Can-Am Defender belt?
Most Can-Am Defender belts should be replaced every 5,000-10,000 miles, depending on your riding conditions. However, some owners report premature wear as early as 500-1,000 miles. Inspect your belt regularly and replace it when you notice signs of wear, regardless of mileage. Harsh operating conditions like mud, water, and heavy loads will significantly reduce belt life.
Can I replace the belt on my Can-Am Defender myself?
Yes, you can replace the belt yourself with the right tools and knowledge. You’ll need a compatible replacement belt and a specialized belt removal tool. The process involves preparing the vehicle, accessing the belt box, removing the old belt, cleaning the CVT system, installing the new belt, and reassembling the components. Following a detailed guide can make this a manageable DIY project.
What causes premature belt failure in Can-Am Defenders?
Premature belt failure is commonly caused by extreme operating conditions (mud, water, heavy loads), improper maintenance practices, and failure to break in new belts correctly. Neglecting regular inspections and cleaning after riding in harsh conditions significantly increases failure risk. About 15% of owners experience complete belt failure within the first 2,000 miles due to these factors.
Are OEM belts better than aftermarket belts for the Can-Am Defender?
OEM belts guarantee compatibility and consistent performance as they’re rigorously tested with your specific vehicle model. However, they’re more expensive than aftermarket options. High-quality aftermarket belts can match or exceed OEM performance at lower prices, though quality varies significantly between brands. Your choice should depend on your budget, riding conditions, and warranty considerations.
How can I extend the life of my Can-Am Defender belt?
Follow the manufacturer’s recommended service schedule and conduct regular inspections. Clean the belt and CVT system after riding in harsh conditions to prevent contamination. Properly break in new belts by avoiding heavy loads for the first 50 miles. Adjust driving habits to minimize unnecessary strain, especially in extreme conditions. Check related components like clutches to ensure proper alignment and function.
What does belt slipping sound like in a Can-Am Defender?
Belt slipping typically produces a high-pitched squealing noise during acceleration or when under load. You may also notice a burning rubber smell. Performance-wise, you’ll experience reduced power transfer, especially when climbing hills or carrying heavy loads. This slipping is more pronounced in wet conditions and is often accompanied by inconsistent power delivery.
How much does it cost to replace a Can-Am Defender belt?
OEM Can-Am Defender belts typically cost between $120-$180, while quality aftermarket options range from $70-$130. If you choose dealer installation, labor costs add approximately $100-$200, bringing the total to $220-$380. DIY replacement eliminates labor costs, saving you significantly. Emergency trail-side replacements from mobile mechanics can cost substantially more.