
We’ve all been there—stranded with a dead battery and desperately reaching for those jumper cables we’ve kept in our trunk for years. But have you ever wondered if those trusty cables might actually be part of the problem? Jumper cables aren’t immune to the effects of time and use, and knowing when they’ve gone bad could be the difference between a quick jump-start and being stuck for hours.
Over time, jumper cables can deteriorate in ways that aren’t always visible to the naked eye. Corrosion, wire damage, and insulation breakdown can all compromise their effectiveness when you need them most. In this text, we’ll explore how to identify bad jumper cables, how long they typically last, and what signs indicate it’s time for a replacement.
Understanding Jumper Cables and Their Lifespan
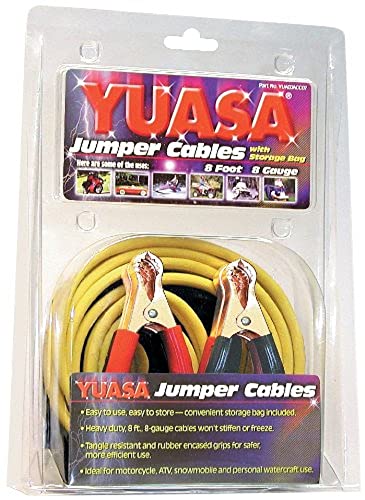
Jumper cables typically last 5-7 years under normal conditions before showing signs of deterioration. Their lifespan depends primarily on construction quality, storage practices, and frequency of use. High-quality cables with thick gauge wiring (4-6 gauge) and durable insulation outlast cheaper alternatives with thinner wires (8+ gauge) and flimsy coating.
Material composition significantly affects jumper cable durability. Copper cables offer superior conductivity and corrosion resistance compared to aluminum alternatives. The clamp quality matters equally—solid brass clamps maintain better connections and resist corrosion longer than zinc-plated steel options that corrode within 2-3 years of regular exposure to moisture.
Environmental conditions play a crucial role in determining how long jumper cables remain functional. Cables stored in high-humidity environments or exposed to temperature extremes deteriorate faster than those kept in climate-controlled spaces. Exposure to automotive fluids such as battery acid, motor oil, or antifreeze rapidly degrades the protective insulation and accelerates wire corrosion.
Usage patterns also impact longevity. Cables used weekly experience more stress and wear than those deployed only for occasional emergencies. Proper handling extends cable life—avoiding sharp bends, storing cables loosely coiled, and cleaning terminals after each use helps maintain their functionality for the maximum possible duration.
Signs That Your Jumper Cables Are Going Bad
Recognizing when your jumper cables have deteriorated is crucial for ensuring they’ll work when you need them most. Regular inspection helps identify these key warning signs before they lead to a roadside emergency.
Visible Physical Damage
Frayed insulation and exposed metal wires represent immediate safety hazards that render jumper cables unusable. These visible defects create risk for electrical shorts and potential injury during use. Melted or stuck clamps, scorch marks, and chemical odors indicate the cables have experienced overheating from previous use. Physical deterioration such as rust formation on the metal components significantly compromises the cables’ ability to conduct electricity properly, making a successful jump start unlikely.
Decreased Conductivity
Poor performance during jump start attempts often signals deteriorating jumper cables. Your vehicle may struggle to start even when connected to a healthy battery, indicating the cables aren’t effectively transferring power. Frequent disconnections during the jumping process result from worn cords that can no longer maintain reliable connections. These conductivity issues typically stem from internal wire damage that isn’t always visible from the outside but nonetheless affects performance.
Corrosion on Clamps and Connectors
Buildup of white, green, or blue substances on clamps and terminals seriously impacts electrical connection quality. High humidity and moisture exposure accelerate corrosion formation, particularly on metal components like clamps and connectors. Regular inspection for discoloration and rust patterns helps identify early corrosion before it completely compromises functionality. Corroded connectors create resistance that prevents sufficient current flow, making jump starting attempts unsuccessful even when both batteries are in good condition.
Factors That Cause Jumper Cables to Deteriorate
Jumper cables deteriorate over time due to several key factors that affect their functionality and safety. Understanding these factors helps vehicle owners maintain their cables properly and know when replacement is necessary.
Environmental Exposure
Environmental conditions significantly impact jumper cable longevity and performance. Moisture and humidity create favorable conditions for corrosion to develop on metal clamps, gradually weakening electrical conductivity. Extreme temperatures pose another serious threat to cable integrity - prolonged heat exposure damages the protective insulation, making wires prone to fraying and shorting. Cold temperatures similarly affect cable flexibility and performance, causing the insulation to become brittle and crack over time. Cables stored in engine compartments or trunks experience intensified temperature fluctuations, accelerating their deterioration compared to those kept in climate-controlled spaces.
Improper Storage
Storage practices directly influence how quickly jumper cables deteriorate. Tight coiling creates stress points and kinks in the wiring, weakening the internal conductors and potentially damaging the outer protective layer. Cables left in damp environments accumulate moisture that seeps into connections and promotes corrosion of the metal components. Physical damage from improper storage includes fraying at stress points, connector damage, and insulation cracks that expose the internal wiring. Proper storage requires loosely coiling cables in a dry, cool location away from chemicals, sharp objects, and extreme temperature variations to maximize their usable lifespan.
Manufacturing Quality
The initial quality of jumper cables largely determines their resistance to deterioration and overall lifespan. Higher-gauge cables (with lower numbers) provide better conductivity and durability than thinner alternatives, with premium options typically using 4-gauge or 6-gauge wire. Cable material composition plays a crucial role - copper cables offer superior conductivity and corrosion resistance compared to aluminum versions, which deteriorate faster even though their lighter weight. Clamp construction represents another critical quality factor, with solid copper clamps delivering better performance than plated versions that wear away after repeated use. Insulation thickness and material quality impact temperature resistance and protection against environmental factors, with premium cables featuring thicker, more flexible insulation that resists cracking and UV damage.
How to Test if Your Jumper Cables Are Still Good
Visual Inspection
Visual inspection serves as the first line of defense against faulty jumper cables. Examine the entire length of your cables for frayed or damaged insulation, which can expose the inner wiring and create safety hazards. Look closely at the clamps for any signs of rust or corrosion that might prevent proper electrical contact. Check the wires themselves for discoloration, which often indicates internal damage or deterioration. Bent or misshapen clamps suggest physical damage that can compromise their gripping ability and electrical conductivity.
Functional Testing
Functional testing confirms whether your jumper cables can actually perform their job. Try using the cables to jump-start a vehicle in a controlled situation before you’re stranded with an emergency. Pay attention to any unusual warming of the cables during use, as excessive heat indicates resistance problems. Monitor how well the clamps maintain their connection during the jump-start process - they shouldn’t slip off or require constant readjustment. Cables that fail to transfer sufficient power to start a vehicle, even though proper connection techniques, are likely compromised and require replacement.
Resistance Testing
For a more technical assessment, you can test the resistance of your jumper cables with a multimeter. Set your multimeter to measure ohms (Ω) and place the probes at opposite ends of each cable. Properly functioning jumper cables should show very low resistance readings - typically less than 0.5 ohms. Higher readings indicate internal damage or excessive wear that restricts electrical flow. Compare the readings between both cables in your set, as important differences point to inconsistent performance that could leave you stranded.
Clamp Connection Test
The integrity of the clamps determines how effectively your jumper cables can transfer power. Test the spring tension in each clamp by opening and closing them several times - they should feel firm and snap back quickly. Ensure the teeth are sharp and align properly when closed, providing maximum surface contact. Touch the metal parts of the clamps together and check that no sparking occurs, which would indicate internal shorts or insulation problems. Clean any visible corrosion with a wire brush and retest the connection to see if performance improves.
Storage Condition Assessment
Examining how you’ve stored your jumper cables can reveal potential issues before they cause failures. Cables stored in damp conditions often develop hidden corrosion within the wire strands that isn’t immediately visible. Untangle any knots or tight coils that might have created stress points in the wiring. Check the storage bag or case for signs of moisture, petroleum products, or battery acid that could have damaged the cables. Cables left exposed to extreme temperatures in a trunk or garage may have compromised insulation that appears intact but has become brittle and prone to cracking.
Extending the Life of Your Jumper Cables
Jumper cables can serve you reliably for years with proper care and maintenance. Implementing simple practices greatly extends their functionality and ensures they’re ready when you need them most.
Proper Storage Techniques
Storing jumper cables correctly dramatically impacts their longevity. Keep your cables in a dry, cool location away from extreme heat or moisture which can degrade the insulation and corrode metal components. Always coil your cables neatly rather than tangling or knotting them, as this prevents unnecessary strain on the wires and connectors. Many drivers find that using a dedicated storage bag or container protects cables from physical damage while keeping them organized in your trunk or garage.
Regular Maintenance Tips
Routine inspection forms the foundation of effective jumper cable maintenance. Examine your cables every few months for signs of wear including frayed insulation, corroded clamps, wire discoloration, or rust development. Pay special attention to the connection points where the wire meets the clamps, as these areas often deteriorate first. Clean any light corrosion from clamps using a wire brush and apply a thin coat of petroleum jelly to the metal parts to prevent future oxidation. Testing your cables periodically ensures they’ll perform when needed—even cables that look fine visually can develop internal issues that affect conductivity.
When to Replace Your Jumper Cables
Jumper cables require replacement approximately every three years, though this timeline varies based on usage frequency and storage conditions. Recognizing the right time to replace these essential emergency tools can save you from being stranded with a dead battery.
Signs That Indicate Replacement Is Necessary
Several clear indicators suggest your jumper cables need replacement:
- Frayed insulation exposes the internal wiring, creating important safety hazards
- Visible corrosion on clamps reduces electrical conductivity and jump-starting effectiveness
- Discoloration of wires often signals internal damage or overheating from previous use
- Rust on metal components indicates moisture damage that compromises functionality
- Difficulty jump-starting vehicles even though proper connection techniques
- Frequent disconnections during jump-start attempts
Regular inspections every few months are crucial, especially if you use your cables frequently. These checks help identify deterioration before complete failure occurs.
Environmental Factors Affecting Replacement Timing
Environmental conditions significantly impact how quickly jumper cables deteriorate:
- Extreme heat accelerates the breakdown of wire insulation
- Moisture exposure promotes corrosion on metal components
- Battery acid contact during previous jump-starts corrodes clamps rapidly
- Physical stress from improper storage damages internal wiring
Cables stored in vehicle trunks experience more temperature fluctuations and potential moisture exposure than those kept in climate-controlled garages, necessitating more frequent replacement.
Quality Considerations for Replacement
When replacing jumper cables, consider these quality factors:
- Cable gauge (lower numbers indicate thicker, more durable wires)
- Insulation thickness protects against damage and electrical hazards
- Clamp construction affects grip strength and corrosion resistance
- Wire material (copper conducts better than aluminum)
High-quality cables might cost more initially but typically last longer and provide more reliable performance in emergency situations. We’ve found that investing in premium cables often proves economical over time due to their extended lifespan and superior reliability.
Conclusion
Jumper cables are a critical emergency tool that requires regular attention. Quality materials and proper storage significantly impact their 5-7 year average lifespan. By conducting routine inspections for corrosion visible damage and conductivity issues you’ll avoid roadside disappointments.
Don’t wait until you’re stranded to discover your cables have deteriorated. Store them properly in dry cool conditions conduct regular maintenance and replace them approximately every three years or when showing clear signs of wear.
Remember that investing in high-quality cables with proper gauge thickness and durable clamps is eventually more economical even though the higher initial cost. They’ll serve you reliably when you need them most keeping you prepared for unexpected battery emergencies.
Frequently Asked Questions
How long do jumper cables typically last?
Jumper cables generally last 5-7 years under normal conditions. Their lifespan depends on factors like construction quality, storage practices, and frequency of use. High-quality cables with thicker gauge wiring and durable insulation will outlast cheaper alternatives. Proper storage in a dry, cool place and careful handling can extend their useful life significantly.
What are signs that jumper cables have gone bad?
Look for visible physical damage like frayed or cracked insulation, exposed wires, and bent or broken clamps. Other indicators include decreased conductivity (cables feel warm during use), corrosion on clamps and connectors, discoloration of wires, and difficulty when jump-starting vehicles. If your jumper cables have any of these issues, it’s time to replace them.
How should I store my jumper cables to extend their life?
Store jumper cables in a dry, cool location away from direct sunlight and extreme temperatures. Coil them loosely without creating sharp bends that can damage the internal wiring. Use a storage bag or container to protect them from moisture and contaminants. Keep them away from battery acid, oil, and chemicals that could damage the insulation.
Can I repair damaged jumper cables instead of replacing them?
While minor issues like light corrosion on clamps can be cleaned, jumper cables with damaged insulation, frayed wires, or significantly corroded components should not be repaired. The electrical safety risks outweigh any cost savings. Attempting repairs on cables used for high-amperage applications like jump-starting can create dangerous situations. It’s safer to replace damaged cables.
How often should I inspect my jumper cables?
Inspect your jumper cables every 3-4 months, especially if they’re frequently used or stored in harsh environments. Before each use, quickly check for visible damage or corrosion. A more thorough inspection should include examining the entire length of cables for wear, testing clamps for proper grip, and looking for any discoloration or damage to the insulation.
What gauge jumper cables should I buy when replacing old ones?
For most passenger vehicles, choose 4-6 gauge cables. Smaller numbers indicate thicker wires that can handle more current. For larger vehicles like trucks and SUVs, 1-3 gauge cables are recommended. Longer cables (20+ feet) should be thicker to compensate for resistance. Always select cables with copper wiring rather than aluminum for better conductivity and durability.
Can extreme weather affect jumper cable performance?
Yes, extreme weather significantly impacts jumper cables. Cold temperatures make cables less flexible and can crack deteriorating insulation. Excessive heat can soften and degrade the insulation over time. High humidity and moisture accelerate corrosion on metal components. Cables exposed to extreme conditions regularly will deteriorate faster and should be inspected more frequently.
How can I test if my jumper cables are still good?
Perform a visual inspection for damaged insulation or corroded clamps. Test functionality by successfully jump-starting a vehicle. For a more thorough assessment, use a multimeter to check for continuity and resistance between ends. Measure resistance - higher than expected readings indicate internal damage. Also, ensure clamps make solid connections and the springs remain strong.
