

Removing jumper cables safely is just as important as connecting them properly. We’ve all been there—your car’s finally running after a jump start, but now what? Disconnecting jumper cables incorrectly can lead to dangerous sparks, electrical damage, or even injury.
In this guide, we’ll walk you through the step-by-step process of safely disconnecting jumper cables from both vehicles. Whether you’re a first-time user or just need a quick refresher, knowing the right technique will protect you and your vehicle’s electrical system. Stick with us to learn the proper sequence that professionals use to ensure a safe, damage-free disconnection every time.
What Are Jumper Cables and Why Proper Disconnection Matters
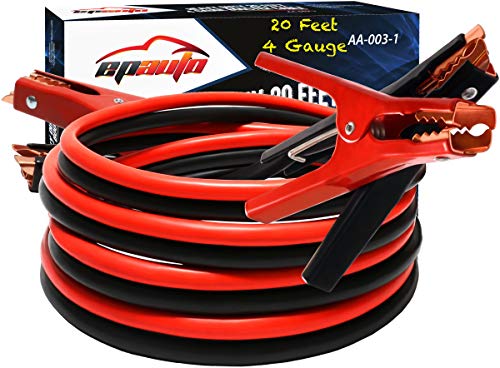
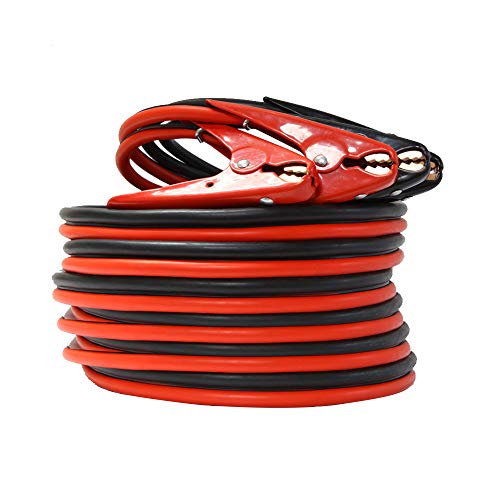
Jumper cables are insulated electrical conductors with alligator clips at each end, designed to connect the batteries of two vehicles during a jump-start procedure. These heavy-duty cables typically measure 10-20 feet in length and contain thick copper wiring capable of transferring sufficient current to start a vehicle with a discharged battery. Most jumper cables come color-coded—red for positive and black for negative—to help users make correct connections.
Proper disconnection of jumper cables matters for several critical reasons. Incorrect removal can cause dangerous electrical arcs or sparks near the battery, potentially igniting hydrogen gas emitted during charging. Besides, improper disconnection may damage sensitive electronic components in modern vehicles, leading to expensive repairs for onboard computers, entertainment systems, or engine control modules.
The risk of electrical shock also exists if cables are removed while current is still flowing through the system. Many mechanics report seeing preventable vehicle electrical system failures caused solely by improper jumper cable disconnection. Following the correct disconnection sequence eliminates these risks and ensures both vehicles remain undamaged after a successful jump-start.

Safety Precautions Before Disconnecting Jumper Cables

Taking proper safety measures before disconnecting jumper cables is essential to prevent electrical hazards and protect both vehicles and yourself. Keeping at least two feet of distance between vehicles minimizes the risk of electrical current passing between them during disconnection.
Personal Safety Equipment to Consider
Removing all jewelry from your wrists, hands, and fingers provides critical protection against potential electrical shock when handling jumper cables. Watches, rings, and bracelets can conduct electricity and create dangerous contact points if they touch battery terminals. Wearing insulated gloves offers an additional safety barrier between your skin and potentially charged components. Safety glasses protect your eyes from accidental sparks or battery acid that might splash during the disconnection process. Loose-fitting clothing should be secured before working with batteries to prevent it from catching on engine components or the jumper cables themselves.
Understanding the Risks of Improper Disconnection
Improper disconnection sequence can cause immediate damage to your vehicle’s battery or drain remaining power, potentially leaving you stranded again. Disconnecting cables in the wrong order creates dangerous electrical arcs that can damage sensitive electronic components in modern vehicles. Sparks generated during incorrect disconnection pose a serious fire hazard, especially since batteries release flammable hydrogen gas during charging. Vehicle computer systems, including engine control modules and infotainment systems, may experience fatal electrical surges if cables are removed improperly. Never disconnect the negative jumper cable from the negative terminal of the dead battery while cables remain connected to the other car, as this exact mistake frequently leads to electrical system damage.
The Correct Order for Disconnecting Jumper Cables

Properly disconnecting jumper cables requires following a exact sequence that’s the reverse of how they were connected. Following this order prevents electrical damage and ensures safety for both vehicles and the person handling the cables.
Step-by-Step Disconnection Process
The disconnection process starts with turning off both engines. After the engines are off, remove the positive (red) cable from the working (donor) car’s battery first. Next, detach the positive cable from the previously dead battery. Then disconnect the negative (black) cable from the unpainted metal surface or engine block of the jumped car. Finally, remove the negative cable from the negative terminal of the working car’s battery. This reverse order is crucial for preventing electrical arcs and potential system damage.
Common Mistakes to Avoid
Disconnecting cables in the wrong order ranks as the most dangerous mistake, potentially causing electrical shocks or vehicle damage. Many people accidentally let the cable ends touch each other or other metal parts during removal, creating short circuits that damage electronic components. Another critical error involves disconnecting the negative cable directly from the dead car’s battery while cables remain connected to the donor vehicle, which can create sparks near the hydrogen gas that batteries naturally emit. Using proper technique keeps both vehicles safe and prevents unnecessary electrical system repairs that often cost hundreds of dollars.
Special Considerations for Different Vehicle Types

Different vehicle types require exact approaches when disconnecting jumper cables due to variations in their electrical systems. Follow these guidelines to ensure safety and prevent damage to modern vehicles, hybrids, and electric cars.
Modern Cars with Sensitive Electronics
Modern vehicles contain sophisticated electronic systems that are vulnerable to power surges during jumper cable disconnection. These sensitive components include engine management computers, infotainment systems, and advanced driver assistance systems. To protect these electronics, turn off all electrical accessories in both vehicles before disconnecting jumper cables. This includes headlights, radios, heated seats, and climate control systems. Following the reverse order of connection (negative cable from jumped car first, then negative from donor, positive from jumped car, finally positive from donor) is especially crucial for these vehicles to prevent sudden power surges that could damage expensive electronic modules.
Hybrid and Electric Vehicles
Hybrid vehicles require special attention when disconnecting jumper cables due to their complex dual-power systems. Always consult the vehicle’s manual before attempting to jump-start or disconnect cables from a hybrid, as procedures vary between manufacturers like Toyota, Honda, and Ford. Most hybrids need to be in “accessory” or “off” mode during the disconnection process to protect their intricate electrical systems.
Electric vehicles (EVs) present a completely different situation, as they don’t have traditional 12V batteries for jump-starting in the conventional sense. Some EVs feature a 12V auxiliary battery that powers secondary systems, which might be jump-started according to manufacturer instructions. In most cases with fully electric vehicles, attempting a traditional jump-start isn’t recommended—the appropriate solution is towing to a charging station or service center. Tesla, Nissan Leaf, and other EV manufacturers typically provide exact emergency procedures in their owner’s manuals that should be strictly followed to avoid damaging expensive battery management systems.
What to Do After Disconnecting Jumper Cables

Once you’ve safely disconnected the jumper cables, several important steps can help ensure your battery remains in good condition. Taking proper care of your battery after a jump start can prevent future issues and extend its lifespan.
Post-Jump Battery Care Tips
Monitor your battery’s performance after the jump start. If your car runs smoothly, the battery was likely just drained and can be recharged through normal driving. But, repeated battery failures shortly after jump starting indicate the battery may be old or faulty and requires replacement.
Let your vehicle run for at least 15-20 minutes after a jump start. This extended runtime helps recharge the battery, especially if it was drained due to minor issues like leaving headlights on overnight.
Inspect the battery terminals for signs of corrosion after jump starting. White or greenish powder buildup on terminals can interfere with electrical connections. Clean corroded terminals using a wire brush and a simple mixture of baking soda and water to restore optimal electrical contact.
Store your jumper cables properly after use to prevent short circuits. Clip the cables together and keep the positive and negative ends separated when placing them back in your trunk or emergency kit.
Seek professional help if you notice any concerning signs during or after the jump start process. Sparks, smoking connections, or failure to start after multiple attempts warrant expert attention to prevent damage to your vehicle’s electrical system.
Consider driving your vehicle for at least 30 minutes after a successful jump start. Highway driving at consistent speeds provides the most effective battery recharging compared to stop-and-go city driving.
Storing Jumper Cables Properly for Future Use

Proper storage of jumper cables extends their lifespan and ensures they’re ready when you need them most. After disconnecting the cables, it’s important to clean them if they’ve been exposed to battery acid. Use a wire brush with a baking soda and water solution to remove any corrosion, then rinse and dry them thoroughly before storing.
Keep your jumper cables in a dry location to prevent corrosion that can compromise their effectiveness. Many drivers store their cables in a plastic bag or container to provide additional protection against moisture in their trunk.
Coil your cables neatly to prevent tangling, which makes them difficult to use in emergency situations. Cable organizers or simple twist ties can help maintain this organization, saving precious time when you’re stuck with a dead battery.
Regular inspection of your jumper cables is essential for reliability. Check for signs of damage such as frayed wires, cracked insulation, or corroded clamps. Replace damaged cables immediately rather than risking electrical problems during a jump start.
Choose an easily accessible storage location in your vehicle, typically in the trunk or cargo area. Having your jumper cables readily available can make a important difference during roadside emergencies when you’re dealing with a stressful situation.
Conclusion
Properly disconnecting jumper cables is just as important as connecting them correctly. By following the reverse order process we’ve outlined you’ll protect your vehicle’s electrical system and ensure your safety. Remember that modern vehicles with sensitive electronics hybrid cars and EVs need special attention during this process.
Don’t forget to drive your vehicle for 15-20 minutes after a jump start to recharge the battery properly. Storing your jumper cables correctly will keep them in good condition for future emergencies.
With these guidelines you’re now equipped to handle battery jump starts safely from start to finish. Keep this knowledge handy – it might save you from costly repairs or dangerous situations down the road.
Frequently Asked Questions
What is the correct order to disconnect jumper cables?
Always disconnect in the reverse order of connection. First, remove the negative cable from the dead battery, then the negative from the donor car. Next, disconnect the positive cable from the dead battery, followed by the positive from the donor car. This sequence prevents electrical arcs and potential damage to vehicle electronics. Always ensure both vehicles are turned off before beginning the disconnection process.
Why is the disconnection order of jumper cables important?
The proper disconnection sequence prevents dangerous electrical arcs and protects sensitive vehicle electronics. Disconnecting in the wrong order can create a complete circuit that may cause sparks near the battery where flammable hydrogen gas might be present. This could lead to battery explosions, fire, or damage to expensive electronic components in modern vehicles. Safety should always be your priority.
Do I need to wear protective gear when disconnecting jumper cables?
Yes, safety gear is highly recommended. Wear insulated gloves to protect against electrical shock and safety glasses to shield your eyes from potential battery acid splashes. Remove metal jewelry like watches and rings that could conduct electricity. These precautions minimize the risk of injury during the disconnection process, especially when working with damaged or older batteries.
Can I disconnect jumper cables with the engines running?
No, always turn off both engines before disconnecting jumper cables. Running engines can generate voltage spikes during disconnection, potentially damaging sensitive electronic components in modern vehicles. After turning off the engines, ensure all electrical accessories (lights, radio, etc.) are also switched off to prevent power surges during the disconnection process.
Are there special considerations for disconnecting cables from hybrid or electric vehicles?
Yes, hybrid and electric vehicles require special handling. For hybrids, consult your owner’s manual first, ensure the vehicle is in “accessory” or “off” mode during disconnection, and be aware of high-voltage components. Most electric vehicles (EVs) cannot be jump-started traditionally and may require professional assistance. Always follow manufacturer recommendations to avoid damaging their complex electrical systems.
How should I store jumper cables after use?
Clean the cables with a damp cloth if they were exposed to battery acid or dirt. Coil them neatly without tight bends to prevent internal wire damage and extend their lifespan. Store them in a dry, cool place in your vehicle, preferably in their original carrying case or a plastic bag. Regularly inspect for frayed insulation or damaged clamps and replace if necessary.
What should I do with my car after disconnecting the jumper cables?
Drive your vehicle for at least 15-20 minutes to allow the alternator to recharge the battery properly. This helps prevent another dead battery situation. Monitor your battery’s performance over the next few days and check for signs of trouble like slow starts or dimming lights. If problems persist, have your battery and charging system tested professionally at an auto parts store.
What are common mistakes to avoid when disconnecting jumper cables?
Avoid letting the cable ends touch each other or any metal surface, which can create dangerous short circuits. Never disconnect in the wrong order or remove cables while engines are running. Don’t rush the process or skip safety precautions like wearing protective gear. Finally, never yank cables off battery terminals, as this can damage both the cables and battery terminals.