

There’s nothing more frustrating than turning your key in the ignition only to hear that dreaded clicking sound. A dead battery can leave you stranded at the worst possible moments—whether you’re rushing to work or trying to get home after a long day. But don’t worry! Jump-starting your car is a simple skill that every driver should master.
We’ve helped thousands of drivers get back on the road quickly and safely. With the right tools and knowledge, you can transform a potential disaster into a minor inconvenience in just minutes. Our step-by-step guide will walk you through the entire process, from identifying a dead battery to successfully jump-starting your vehicle without damaging its sensitive electronics.
Understanding Car Battery Basics
Car batteries function as the heart of your vehicle’s electrical system, storing and delivering electrical energy. Understanding how batteries work and what causes them to fail gives you a better foundation for dealing with jump start situations effectively.
How Car Batteries Work
Car batteries convert chemical energy into electrical power through a lead-acid chemical reaction. Inside a typical 12-volt battery, six cells connected in series each produce 2.1 volts. These cells contain lead plates submerged in an electrolyte solution of sulfuric acid and water. When you turn the key or press the start button, the battery delivers electricity to the starter motor, ignition system, and other components. While running, your car’s alternator recharges the battery, maintaining its power level for future use. The entire system operates in a continuous cycle of discharge during starting and recharge during driving.
Common Causes of Battery Failure
Battery failures stem from several predictable factors that affect performance and lifespan. Extreme temperatures represent one of the most important threats - excessive heat accelerates internal corrosion while cold weather reduces a battery’s capacity by up to 50%. Age naturally diminishes battery efficiency, with most batteries lasting 3-5 years before requiring replacement. Parasitic drains from electronics left on or malfunctioning components gradually deplete power reserves overnight. Corroded terminals interrupt proper electrical flow, creating resistance that prevents efficient charging and discharging. Alternator problems fail to properly recharge the battery during driving, leading to chronic undercharging that damages battery cells. Regular short trips also contribute to battery deterioration since the alternator doesn’t have sufficient time to replace the energy used during startup.
Signs You Need to Jump Start Your Car Battery
Car Engine Won’t Start
A completely unresponsive engine after turning the key or pressing the start button typically indicates a dead battery. This common scenario happens when headlights remain on overnight, battery connections loosen, or during exposure to extreme temperatures. The absence of any sound or light on your dashboard confirms your battery lacks sufficient charge to power your vehicle’s electrical system.
Engine Is Cranking But Not Starting
Hearing a chugging or cranking sound when attempting to start your vehicle signals a weak battery. Your starter motor receives enough power to crank but can’t deliver the full charge needed for ignition. Jumper cables provide the necessary additional current to overcome this weakness and get your engine running again.
Frequent Jump Starts
Repeatedly needing jump starts indicates serious underlying battery issues. Multiple jump starts in a short timeframe put excessive strain on your vehicle’s charging system and can damage the alternator. This pattern serves as a clear warning that your battery requires replacement rather than continuous jumping.
Age of the Battery
Car batteries typically last 4-5 years before performance naturally declines. An aging battery becomes increasingly unreliable and may die without warning, leaving you stranded. After multiple years of service, your battery’s capacity to hold charge diminishes substantially, making jump starts less effective with each occurrence.
Weak Battery Sounds
Distinctive sounds often reveal battery problems before complete failure occurs. A rapid clicking noise when turning the key indicates insufficient power reaching the starter motor. Alternatively, a low whining sound suggests your battery retains minimal charge but can’t deliver enough current to engage the starter properly.
Swelling or Bulging Battery Case
Physical deformation of your battery case suggests internal damage from overheating or overcharging. While not directly related to needing a jump start, this visible warning sign indicates potential battery failure. A swollen battery requires immediate replacement for safety reasons, though it may temporarily respond to a jump start if you’re in an emergency situation.
Battery Voltage and Warning Lights
Voltage readings below 14V while the engine runs signal charging system problems. Your dashboard battery warning light illuminates when the electrical system detects insufficient voltage output. Both indicators suggest your battery isn’t receiving proper charging from the alternator, eventually leading to a situation requiring a jump start.
Essential Tools for Jump Starting a Car Battery
Jump starting a car battery requires exact tools designed for safely transferring power to a dead battery. Let’s explore the two main methods for jump starting: traditional jumper cables and portable jump starters.
Jumper Cables
Jumper cables serve as the traditional and most common tool for jump starting a vehicle. These cables consist of red and black insulated wires that connect to the positive and negative terminals of both batteries. The red cable attaches to the positive (+) terminals, typically marked with a “+” sign or red color, while the black cable connects to the negative (-) terminals, marked with a “-” sign or black color.
To use jumper cables properly:
- Connect one end of the red cable to the positive terminal of the dead battery
- Attach the other end of the red cable to the positive terminal of the donor battery
- Connect one end of the black cable to the negative terminal of the donor battery
- Secure the remaining end of the black cable to a metal surface on the car with the dead battery, keeping it away from the battery itself
This connection sequence helps prevent sparks near the battery, reducing explosion risks during the jump starting process.
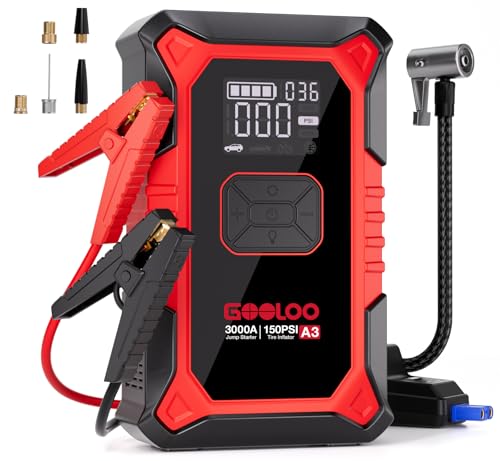
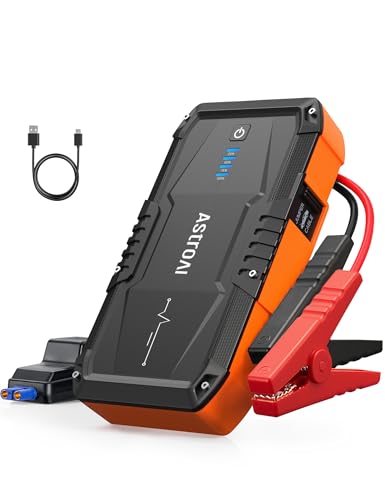
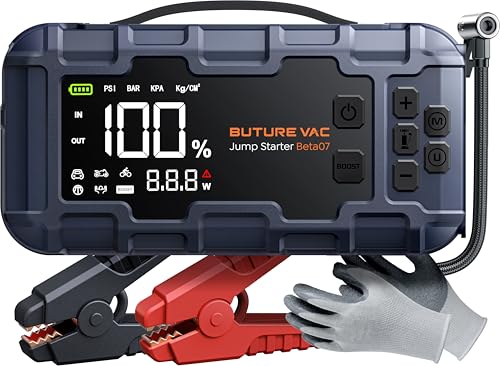
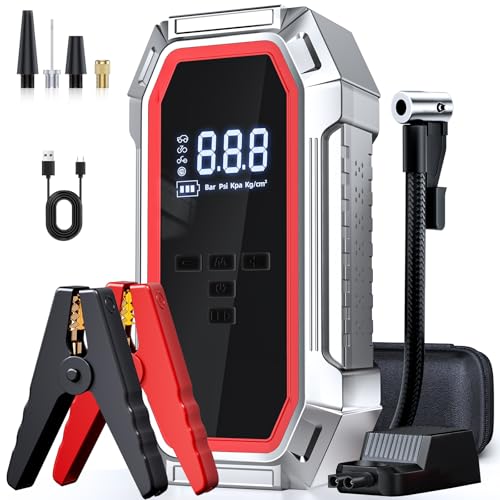
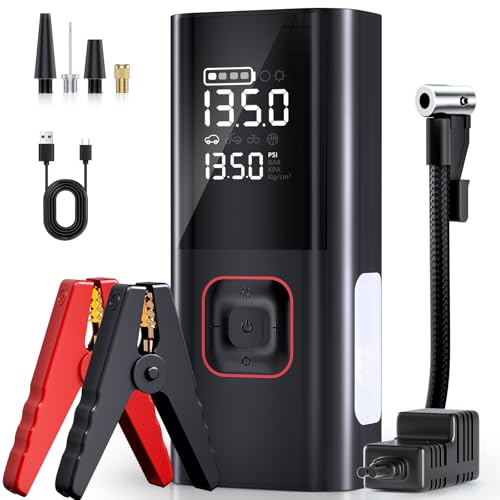
Portable Jump Starters
Portable jump starters offer a self-contained solution that doesn’t require another vehicle. These compact units contain rechargeable batteries with enough power to start most vehicles. Modern portable jump starters come with built-in jumper cables and safety features that prevent reverse polarity connections.
Using a portable jump starter involves:
- Ensuring the jump starter has sufficient charge
- Connecting the red clamp to the dead battery’s positive terminal
- Attaching the black clamp to the negative terminal
- Turning on the jump starter
- Starting the vehicle
- Removing the clamps in reverse order after the engine starts
Many portable jump starters include additional features like USB charging ports for electronic devices, built-in flashlights for nighttime emergencies, and air compressors for tire inflation, making them versatile emergency tools.
Jumper Cables vs. Portable Jump Starters
Jumper cables provide a cost-effective solution that’s widely available in most auto parts stores. Their simple design makes them easy to store in a vehicle, though they require a donor vehicle with a good battery to function.
Portable jump starters offer important advantages in convenience and independence. These devices eliminate the need for another vehicle, making them ideal for drivers who travel in remote areas or during late hours. Their built-in safety features also reduce the risk of electrical damage to vehicle components.
The primary drawbacks of portable jump starters include their higher cost compared to basic jumper cables and the need for periodic recharging to maintain effectiveness. Even though being marketed as portable, some units can be relatively bulky and add weight to your emergency kit.
For maximum preparedness, many experienced drivers keep both options available—jumper cables for situations when help is nearby, and a portable jump starter for complete self-sufficiency in emergency situations.
Step-by-Step Guide to Jump Start Your Car Battery
Jump starting a car battery requires careful attention to safety and proper technique. Following these steps ensures you’ll get back on the road quickly while protecting your vehicle’s electrical system.
Safety Precautions Before You Begin
Safety comes first when jump starting any vehicle. Turn off both vehicles completely before attempting to connect jumper cables. Put both cars in park or neutral with parking brakes engaged to prevent any unexpected movement. Remove metal jewelry like watches or rings that could conduct electricity. Keep your face and body away from the batteries during the process as batteries can emit hydrogen gas that’s potentially explosive. Never jump start a cracked, leaking, or visibly damaged battery as this creates serious safety hazards. Ensure children stay clear of both vehicles throughout the entire process.
Proper Cable Connection Sequence
Connecting jumper cables in the correct sequence prevents dangerous sparks and protects vehicle electronics. Follow this exact order:
- Connect the red (positive) clamp to the positive terminal (+) of the dead battery
- Attach the other red clamp to the positive terminal (+) of the good battery
- Connect the black (negative) clamp to the negative terminal (-) of the good battery
- Attach the final black clamp to an unpainted metal surface on the engine block of the car with the dead battery (not to the negative terminal)
This sequence creates a proper ground connection and minimizes the risk of sparks near the battery where hydrogen gas might be present. Double-check all connections before proceeding to ensure they’re tight and secure on their respective terminals or surfaces.
Starting the Dead Battery
Once cables are properly connected, start the engine of the vehicle with the good battery and let it run for 2-3 minutes. Rev the engine slightly to around 2,000 RPM to help charge the dead battery faster. Try starting the vehicle with the dead battery while the donor car continues running. If it doesn’t start immediately, wait an additional 5 minutes before trying again. After the dead car starts successfully, let both vehicles run for at least 20-30 minutes to allow the alternator to recharge the weak battery. Disconnect the cables in the exact reverse order of connection: black from ground, black from negative terminal, red from donor car, and finally red from the previously dead battery. Drive the jumped vehicle for at least 30 minutes to ensure the battery receives adequate charge from the alternator.

What to Do After Successfully Jump Starting
Drive the Vehicle
Driving the vehicle with the newly jumped battery is essential for proper recharging. Take the car for a drive lasting at least 20 minutes to allow the alternator sufficient time to recharge the battery completely. This extended driving period ensures that the battery receives adequate charge for future starts and helps restore its overall functionality. Longer drives on highways rather than stop-and-go traffic provide optimal charging conditions for your battery.
Disconnect Jumper Cables
Removing jumper cables correctly prevents electrical damage and ensures safety. Always disconnect the cables in the reverse order of how they were connected to avoid sparks or system damage:
- Remove the negative (black) clamp from the negative terminal of the dead battery first
- Detach the negative (black) clamp from the negative terminal of the good battery
- Take off the positive (red) clamp from the positive terminal of the good battery
- Disconnect the positive (red) clamp from the positive terminal of the dead battery last
Check the Battery and Electrical System
Battery performance after a jump start indicates its overall health and condition. If your car starts but fails to hold a charge even after driving for 20+ minutes, you’re likely experiencing deeper issues with your electrical system. The problem might stem from a failing battery that needs replacement, a malfunctioning alternator that can’t properly recharge the battery, or other electrical system components requiring professional diagnosis. Regular voltage testing helps identify potential problems before they leave you stranded again.
Safety Precautions
Electrical safety after a jump start protects both you and your vehicle’s sensitive electronics. Turn off all accessories including headlights, interior lights, radio, and climate control systems during and immediately after the jump-start process. These power-drawing components can create electrical surges that potentially damage your vehicle’s electrical system or computer modules. Allowing the vehicle to run without additional electrical load for several minutes gives the system time to stabilize before gradually reintroducing electrical demands.
When Jump Starting Doesn’t Work
Sometimes jump starting your car doesn’t resolve the issue, leaving you still stranded with a vehicle that won’t start. Understanding why a jump start might fail can help you diagnose the problem and take appropriate action. Let’s explore the common reasons jump starts fail and what you can do about them.
Battery Voltage Too Low
Inadequate voltage levels prevent successful jump starts even with properly connected cables. Your recipient car’s battery needs at least 5 minutes of charging time with the donor vehicle’s engine running to build up sufficient power. Batteries with voltage readings below 12.6 volts typically lack enough energy to turn over the engine, regardless of how long jumper cables remain connected.
Loose or Corroded Battery Terminals
Corrosion and loose connections block electrical flow between the battery and your vehicle’s systems. White, blue, or greenish deposits on battery terminals act as insulators, preventing proper current transfer during jump start attempts. Using a wire brush to clean the terminals and tightening cable clamps ensures optimal electrical conductivity for successful starting.
Completely Dead Battery
Batteries that have fully depleted their charge often can’t be revived through jump starting. A completely dead battery lacks the capacity to accept or hold enough charge to power your starter motor. In these cases, replacing the battery with a new one represents the only viable solution to get your vehicle running again.
Problems with the Charging System
Faulty alternators or damaged charging components prevent proper battery recharging. Your car’s alternator generates electricity while the engine runs, maintaining battery charge levels during operation. When this system fails, your battery gradually depletes its power reserve even after a successful jump start, leading to repeated starting failures.
Improper Connections
Incorrect jumper cable connections create ineffective charging circuits during jump start attempts. Red cables must connect to positive terminals (+) and black cables to negative terminals (-) in the proper sequence to safely transfer power between vehicles. Loose or reversed connections not only prevent successful jump starts but potentially damage sensitive electronic components in modern vehicles.
Insufficient Power from the Donor Vehicle
Weak donor batteries can’t provide enough jump-starting power to revive your car. The helping vehicle’s battery needs adequate charge capacity to effectively transfer energy to your dead battery. Running the donor vehicle’s engine during the jump start process increases available power output and improves chances of successfully starting your car.
Jump Starter Device Issues
Portable jump starter devices require sufficient internal charge to function properly. Your jump starter needs at least 20% charge capacity to attempt a jump start, but performance improves dramatically with charge levels above 80%. Proper clamp attachment to battery terminals also affects jump starter effectiveness, with secure connections providing optimal power transfer to your dead battery.
Tips to Maintain Your Car Battery
Regular battery maintenance prevents the need for frequent jump starts and extends your battery’s lifespan. Let’s explore the most effective ways to keep your car battery in optimal condition.
Clean the Battery
Battery terminals collect corrosion over time, interfering with electrical connections. We recommend cleaning the terminals regularly using a damp cloth or specialized battery cleaning solution to prevent buildup that can impede power flow.
Maintain the Battery Tray
A clean battery tray ensures proper functioning and prevents damage. Use a wire brush with a baking soda solution to remove rust or corrosion from the tray, making sure it’s completely dry before reinstalling the battery.
Secure the Battery
Loose batteries experience damaging vibrations that compromise internal components. Check that your battery is firmly fastened in its tray and tighten any loose connections or brackets to prevent unnecessary movement during driving.
Avoid Short Trips
Short drives don’t allow your alternator sufficient time to recharge the battery fully. Combine multiple errands into one longer trip or take a 20-30 minute drive weekly to ensure proper battery charging.
Limit Electrical Load When Engine is Off
Electronics drain your battery when the engine isn’t running to recharge it. Turn off headlights, interior lights, and unplug devices like smartphones and GPS units before shutting down your vehicle to preserve battery power.
Check Battery Fluid Levels
Batteries with removable caps require periodic electrolyte level inspections. Top off low levels with distilled water only, avoiding tap water that contains minerals harmful to battery cells.
Use a Trickle Charger
Vehicles sitting unused for extended periods experience battery discharge. Connect a trickle charger to maintain optimal charge levels during storage or infrequent use periods.
Regular Driving
Consistent vehicle use keeps your battery at proper charge levels. Drive your car regularly to prevent the battery degradation that occurs during prolonged inactivity.
Monitor Battery Health
Testing your battery’s condition helps identify potential issues before complete failure occurs. Use a multimeter or battery tester to check voltage output, replacing batteries that consistently read below 12.4 volts when fully charged.
Conclusion
Knowing how to jump-start a car battery is an essential skill that can save you from being stranded when you least expect it. With the right tools and proper technique you can get back on the road quickly and safely.
Remember that regular battery maintenance can prevent most dead battery situations. Whether you choose jumper cables or a portable jump starter always prioritize safety throughout the process.
We hope this guide has equipped you with the knowledge to handle battery emergencies confidently. By understanding your vehicle’s electrical system and following our step-by-step instructions you’ll be prepared to tackle this common roadside challenge anytime it occurs.
Frequently Asked Questions
How do I know if my car battery is dead?
Look for these signs: your engine doesn’t respond when you turn the key, you hear clicking sounds but no start, dashboard lights are dim or don’t work, and the car has needed frequent jump starts recently. Other indicators include a swollen battery case, corrosion on terminals, or if your battery is over 4-5 years old. A voltage reading below 12.6V also suggests a dead or dying battery.
What tools do I need to jump-start a car?
You need either jumper cables or a portable jump starter. Traditional jumper cables require another vehicle with a good battery. They consist of red and black insulated wires with clamps. Alternatively, portable jump starters are self-contained power packs that don’t require another vehicle. They’re more convenient but typically more expensive than basic jumper cables.
What is the correct order for connecting jumper cables?
Connect in this exact order: First, attach the red cable to the positive terminal of the dead battery. Second, connect the other end of the red cable to the positive terminal of the donor battery. Third, attach the black cable to the negative terminal of the donor battery. Finally, connect the other end of the black cable to an unpainted metal surface on the dead car’s engine.
How long should I let my car run after a jump-start?
Drive your car for at least 20-30 minutes after a successful jump-start. This allows your alternator sufficient time to recharge the battery. Avoid turning off the engine too soon or you might need another jump-start. If possible, take a highway drive rather than city driving with frequent stops, as continuous driving provides better charging.
Why might a jump-start not work?
A jump-start might fail due to several reasons: severely discharged battery (below critical voltage), corroded or loose terminal connections, damaged battery cells, faulty alternator or charging system, improper jumper cable connections, insufficient power from the donor vehicle, or electronics left on during the process. If multiple jump attempts fail, you likely need professional diagnostics.
Can jump-starting damage my car’s electronics?
Yes, improper jump-starting can damage sensitive electronics. Modern vehicles have complex computer systems that can be harmed by voltage spikes. Always follow the correct connection sequence, avoid letting the cable clamps touch each other, and ensure proper connections. Turn off all electronics in both vehicles before jump-starting to minimize risk of damage.
How often can I jump-start my battery before replacing it?
If you need to jump-start your battery more than twice in a week or three times in a month, it’s time to replace the battery. Frequent jump-starts indicate the battery can no longer hold a charge properly. Most car batteries last 4-5 years, so consider replacement if yours is approaching this age range, especially if jump-starts are becoming a regular occurrence.
What maintenance can prevent the need for jump-starts?
Regularly clean battery terminals to prevent corrosion, avoid leaving lights or electronics on when the engine is off, limit short trips that don’t fully recharge the battery, secure battery connections, drive your vehicle regularly, and consider using a trickle charger for vehicles stored long-term. Have your battery and charging system tested annually, especially before extreme weather seasons.
Can I jump-start a car in the rain?
Yes, you can jump-start a car in the rain, but exercise extra caution. The risk comes not from electrocution (car batteries use low voltage) but from slipping or creating electrical shorts. Wear rubber-soled shoes, keep connections away from puddles, and ensure cables are properly insulated. If possible, use a portable jump starter instead of cables for added safety in wet conditions.
Should I replace my jump-started battery immediately?
Not necessarily. After a successful jump-start, drive for at least 30 minutes to recharge the battery, then monitor its performance over the next few days. If the car starts normally afterward, your battery may still have useful life. However, if you experience starting problems again or the battery is old (4+ years), it’s wise to have it tested and consider replacement soon.